TUTORIALS
 
.BOX MODELING
read the instructions and work according to the pictures (look at the parameters)
 
 
  Part 1
      

Step 1- make a box.

Step 2 - apply a bend modifier.

Step 3 - select the 2 faces and extrude. After that scale with negative values.

Step 4 - select the front faces,extrude it with negative values then scale it with negative values. Repeat that again.

Step 5 -apply ffd 2x2x2 modifier to make some fixes in proportions (if you think its needed).

Step 6 - making the cockpit select the faces,extrude and scale with negative values.

Step 7 - (this step is a bit complex so if you cant handle it yet skip to next part and then come back when you are more experienced with boxmodeling.)Select all faces in 1 side of the cockpit and extrude with negative values, then repeat the process in all 4 sides of the cockpit and adjust it until you are happy with the result. Select al the faces in all the inner parts of the cockpit (as shown in pic) and give them ID-2. After that, launch the material editor and and make a new multy/sub object material change the colors (as show in the pic or as you wish to)and assign it to the model.


  Part 2
      

Step 
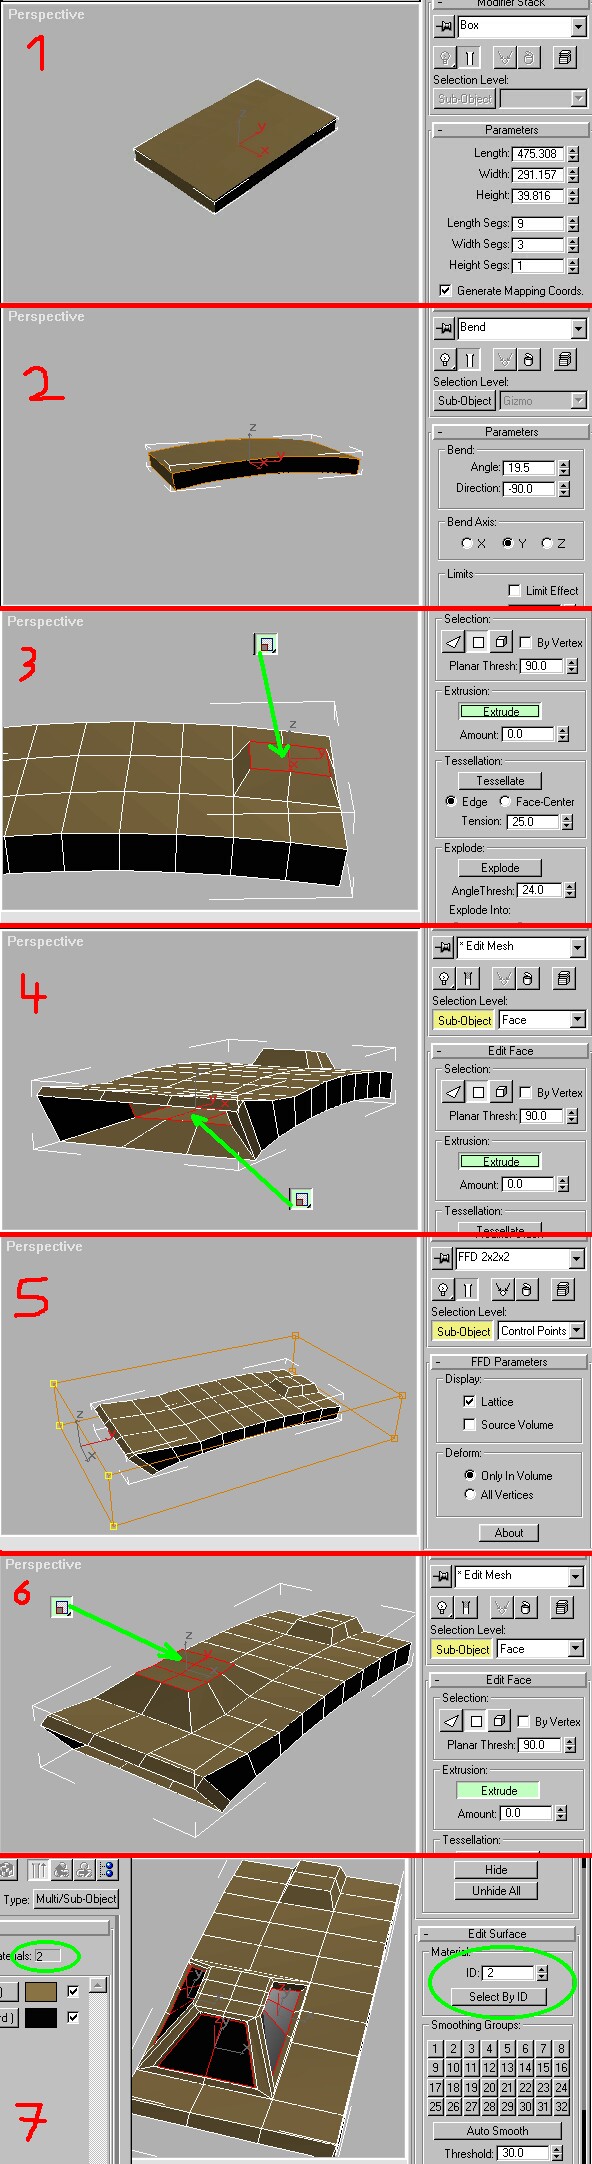
1- hide the model and make a box.

Step 2 - apply an edit mesh modifier ,scale and move vortexes.

Step 3 - select and move vortexes.

Step 4 - select face, extrude with negative value,move down,scale with negative value.

Step 5 - extrude with negative value again. select and move vortexes.

Step 6 - select and move vortexes (make sure you always select 2 vortexes).

Step 7 - select the face, extrude and move it.

Step 8 - select the 2 front vortexes in the new face and drag them lower until they meet the 2 vortexes below them. Now select all 4 vortexes and weld them into 2 (increase the weld tresh slowly until it will work, note that if the value is too high it will weld all 4 vortexes into 1 and then it will mess your model up). now select the 2 back vortexes of that face and move them forward.

Step 9 - select the face again and extrude it (if moving it messes it up).

Step 10 - now extrude and scale it with a negative value.

Step 11 - close the subject selection and apply an edit mesh modifier.

Step 
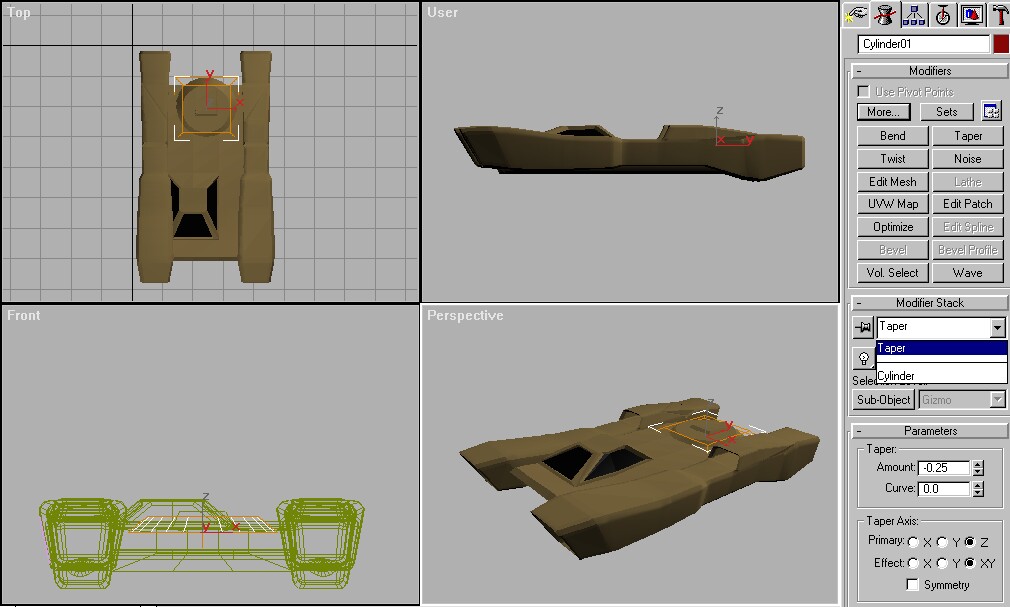
12 - apply a bend modifier.

Step 
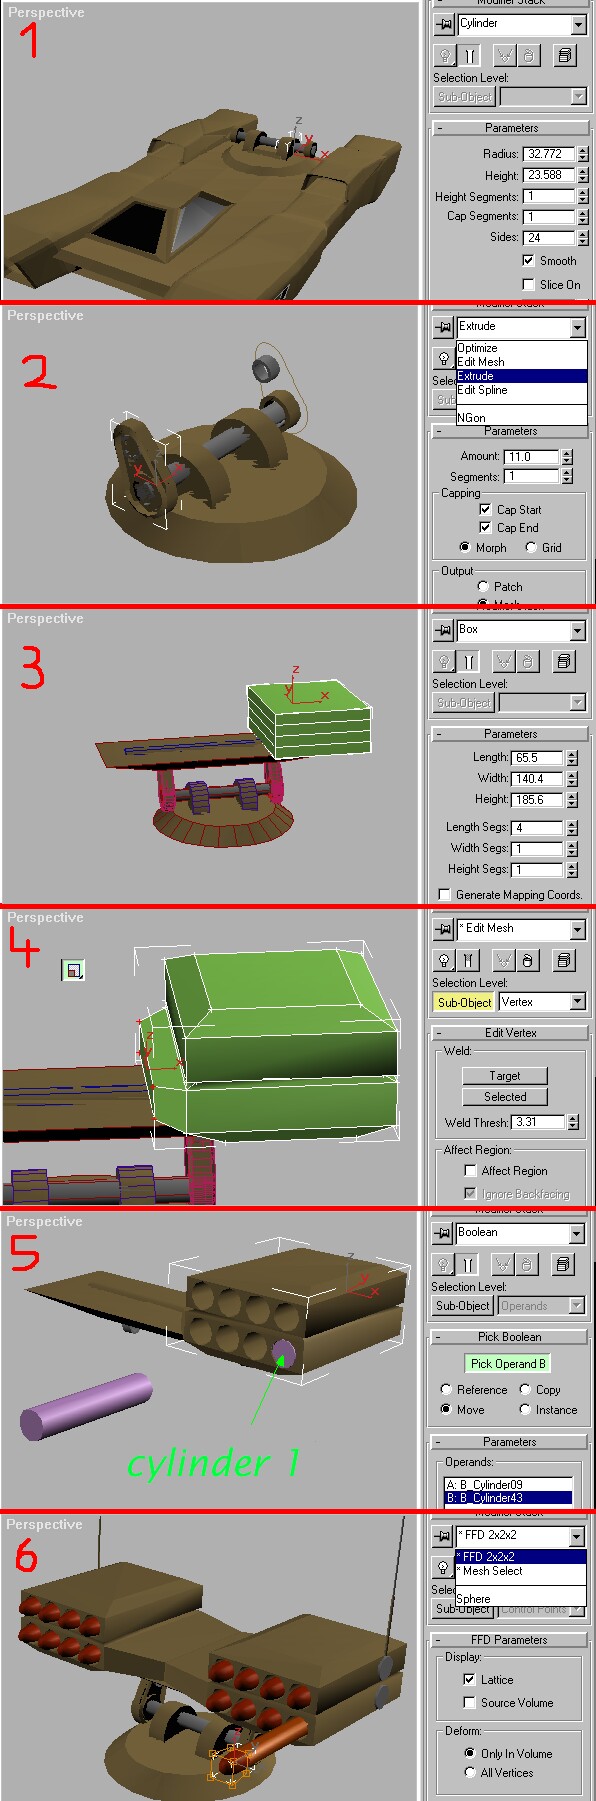
13 - make some final fixes (depending on how the end result came out).

Step 14 - and a small cylinder on the bottom and some other stuff to add more detail and then group it.


  Part 3
      

Step 1 - unhide the body model from Step 1, select and position the side engine model from step2 on 1 side of the body and then clone it and position on the other side. Create a cylinder on the middle of the back part of the body and apply a taper modifier to it .


  Part 4
      

Step 1- create 2 cylinders in 90* to the cylinder and position them so only half of them will show. Make a new thin long cylinder go through both of them and then make 2 tubes on the edges of the cylinder

Step 2 - make an NGon line and edit spline it to give it an egg sorta shape. Then either bevel it or extrude and and edit mesh it to get it to look as shown in the image. Add a tube to the higher part of the model then clone and mirror it and position it on the other side.

Step 3 -add a box on top of it and apply a taper modifier. Add a box on top of it to 1 of the sides of it.

Step 4 - scale and move vortexes.

Step 5 - create a cylinder and place it so that part of it is in the box and part of it isn't. Clone it 8 (unless you want more/less missiles) times. Apply edit mesh to 1 of them and attach all 8 of them togheter. select the box, create a Boolean and pick the joined cylinder as operand B .

Step 6 - edit mesh it so it will go exactly to the middle and then clone the box .Then create your own missiles and position them in their places. Add some more detail like the antennas and stuff you can think of.

Now unhide everything. The modeling part is done.


Copyright © 2001 Zman
Site Meter