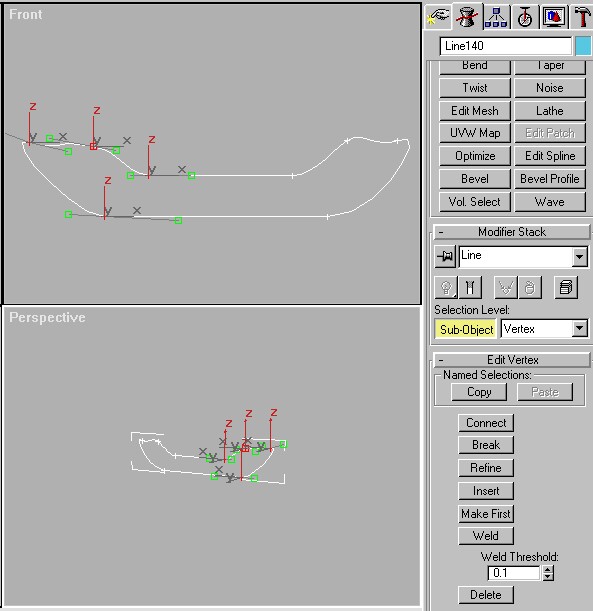
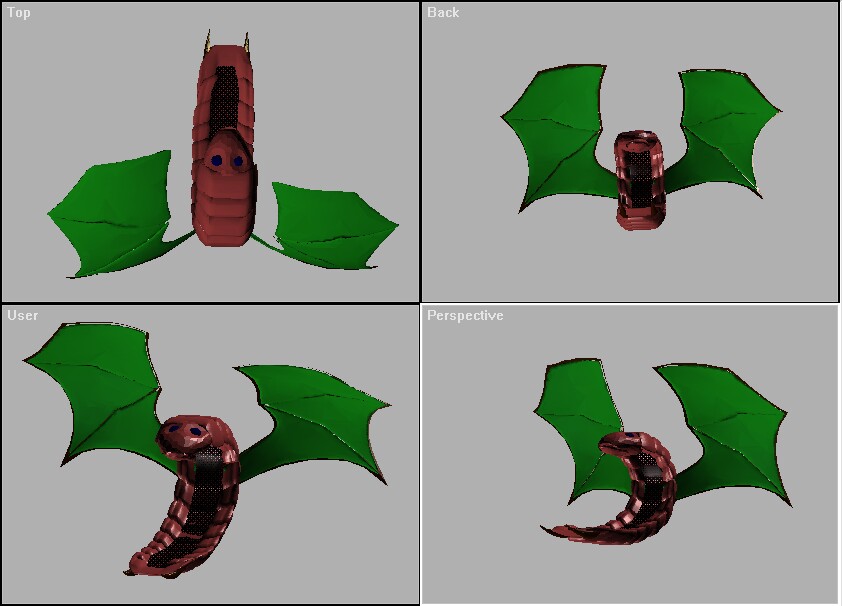
TUTORIALS
 
.SPLINE MODELING
read the instructions and work according to the pictures (look at the parameters)
 
 
  Step 1
      

make a closed spline shape which will look similar to the 1 in the image.


  Step 2
      

bevel it with 3 levels. use same height in all the levels (use a slightly higher value in the second level). use a positive uotline value in level 1 dont input any value in level 2 (0) and use a negative outline value in level 3.


  Step 3
      

add a ffd 3x3x3 modifier and move the middle control points backwards.


  Step 4
      

add a meshsmooth modifier (you can add some more modifiers until you get it to look like you want to)


  Step 5
      

clone it once and move it along the x axis then select both objects, clone and move them again. repeat this proccess until you have about 25 objects. group and name it mutalisk.


  Step 6
      

create a line which will be the profile of the mutalisk's body. then select the mutalisk group and apply a path deform modifier to it. pick the line as the path and adjust the parameters until the group gets the shape of the profile line. ungroup it and delete the unnessecery objects that pass the profile's limits. select again all the objects except for the first and last one and group it again.


  Step 7
      

add a ffd box modifier with 4x2x4 dimensions. scale the bottom left controle points with negative value and move other controle points as shown in the image.


  Step 8
      

select the last object on the bottom which is not grouped with the rest of the objects and apply a ffd 4x4x4 modifier to it. scale and move controle points in the last 2 lines to get it to look like it ends up (as shown in the image). when you are done with it detail it up. you can add 2 spikes by making 2 cones and applying modifiers to them (as shown in top left part of the image).


  Step 9
      

making the mutalisk's head :

Step 1- make a geosphere with only 2 segments and position it near the last top object of the mutalisk body.
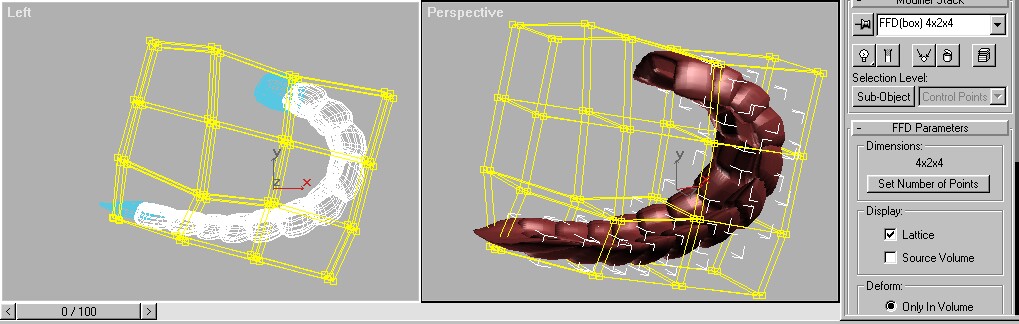
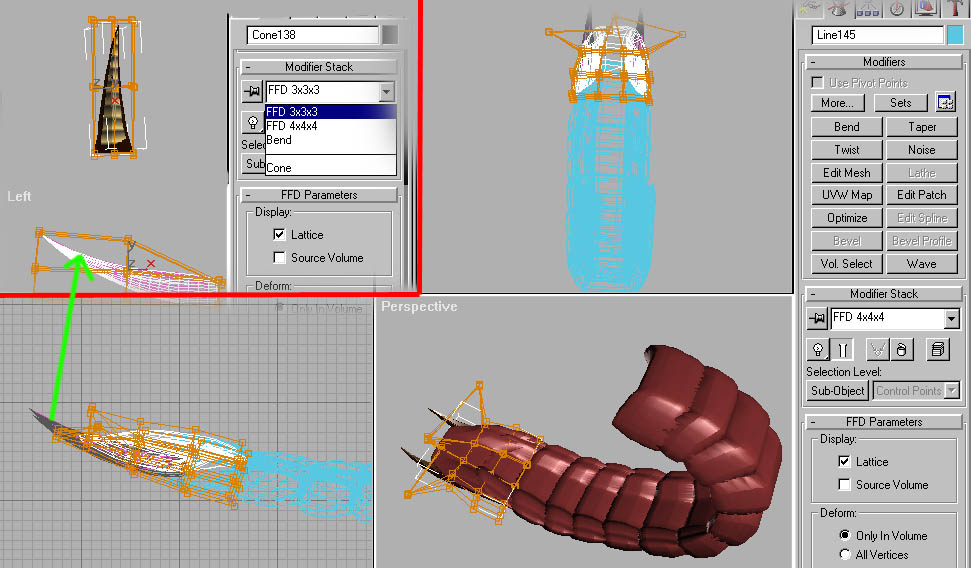
Step 2 - add a ffd 3x3x3 modifier and move controle points as shown in the image.

Step 3 -add an edit mesh modifier, select the 2 vortexes and slightly pull them downwards (look at the image to see what vortexes to choose).

Step 4 - add a meshsmooth modifier and then add 2 spheres and position them so that most of them will be inside the holes to make the eyes.

Step 5 - create a new geosphere and modify it (with ffd modifiers) in a similar way (like in step 2) to make the bottom part of the mouth.


  Step 10
      

to add some additional detail to the body make a box with about 15 height segments, use the path deform tool to get the basic mutalisk shape and then position it "inside" the mutalisk group and use an edit mesh modifier to move vortexes and position it as the inner part of the mutalisk group(as shown in image).when you are done apply a meshsmooth modifier and edit mesh it again to make some final fixes.

note that i leave the texturing of the mutalisk to you but you should use the basic material parameters like the parameters in the image for this object.


  Step 11
      

onto making the wing :

group all the objects made from step 1 - 10 name it mutaliskbody and hide it.

create the basic wing shape with lines (you can use more then 1 line and then attach) and end up with an open spline (no need to weld points anywhere) as shown in the image.


  Step 12
      

after beveling the shape you should get something which will look like the model in the image.


  Step 13
      

create closed splines in the empty areas and slightly extrude them.


  Step 14
      

to get it to look more 3d extrude it. it is also recomended to optimize it because there's no need for a high poly count.


  Step 15
      

group everyrthing and name it mutawing. then apply a ffd 3x3x3 modifierto it and pull the middle controle points backwards.

it is also reccomended now to move the pivot (use affect pivot only) to the bottom of the wing so it will be easier to animate the wing later on.


  Step 16
      

now all you have to do is unhide the mutalisk's body, position the wing correctly on 1 side and then clone,miror and move it to the other side.


Copyright © 2001 Zman
Site Meter